

My husband gets these medal hangers with his uniforms on from work I really don't care to use medal hangers so I thought I would try something with them and this is what came up with.
A ribbon covered hanger.

Here are the items I used
Hanger (you could also use plastic ones)
Packaging tape
Plastic bags (about 3 or 4 for each hanger)
Hot glue and a glue gun
Ribbon
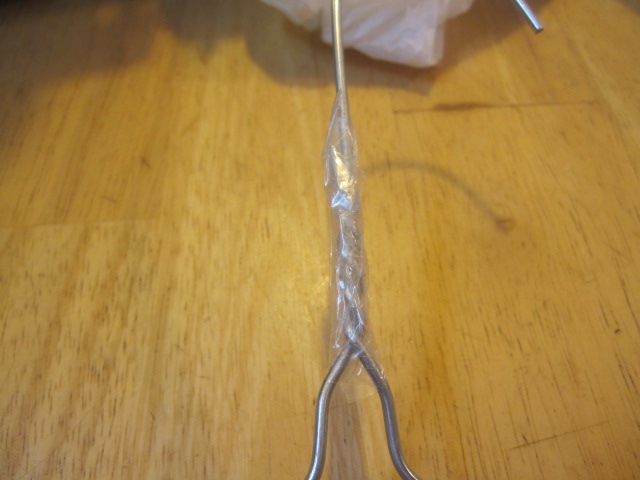
First I covered the part where the hanger is joined with packaging tape so no sharp ends
would cut through my finished product.

I covered the entire hanger except for the top part of the hook with white plastic bags.
Careful to turn any print on the bags to the inside.
Try making this kind of fluffy but also evenly wrapped.
When starting and ending each bag I put a small piece of the packaging tape on it to hold it to the hanger.

Wrap the ribbon around the bag covered hanger making sure that each time you go around slightly overlaps the previous one.
I put a dot of hot glue each time I went around to hold the ribbon down.First I did not know if this would work because I was afraid it would melt the plastic.
I used a mini low temp glue gun.

There were times I put a strip of glue on the ribbon for a better hold and the ribbon laid better.
(I really thought this way worked better and did it this way like for half the project.)

When you get all way around with the ribbon tie a bow on the top.
wound it was better to cut my ribbon and glue he end down and then make a bow tying it around.
Make sure to cut your ribbon on a slant this helps to keep ribbon from fraying.

Enjoy using your new hangers or give them as a gift.
My little gir thought these were great. She loves pretty girly things.
9 comments:
owo that a good idea thanks for the tuto ^^
This is a great project. When I was little my mom and I would cover metal hangers with yarn. This reminds me of that, but yours are WAY prettier!
Thank you, for such a great post and for linking it up for "Simply Homemaking!" :0) Don't forget to link back to me!
Blessings,
ESTHER
Our Simple Country Life
This so pretty. I would of never came up with that idea. It makes your daughter's outfit more lovely. Thanks so much for linking up to Terrific Under Ten!
A great tutorial. These would make such a nice Mother's Day gift. Thanks for the sweet comment on my blog today -- it's appreciated! - Suzanne
You are so crafty! I keep thinking I should do more arts and crafts, but instead I end up in the kitchen, in the garden or on the computer. This is a very cute idea.
Great project!! We get tons of uniform hangers too!! Thanks for auditioning for OMTWI!!
Don't forget to put a OMTWI button in your post or sidebar!
Great project and reuse of the hangers! They are so pretty now, no wonder your daughter loves them. :) Thank you for linking up to Inspiration Friday At The Picket Fence!
Heather @At The Picket Fence
Post a Comment